

How to Tune Stabilizers
Why tune your stabilizers?
Stabilizers help stabilize larger keys, such as the space bar or backspace, when making a key press. Tuning your stabilizers eliminates unwanted rattle caused by the parts making contact with each other and improves smoothness during operation. The application of lube also modifies the acoustics of your stabilizers. A coat of lube can result in a desirable dampened sound.
Modding stabilizers is a delicate process that requires patience. However, with patience comes the reward of beautifully tuned stabilizers!
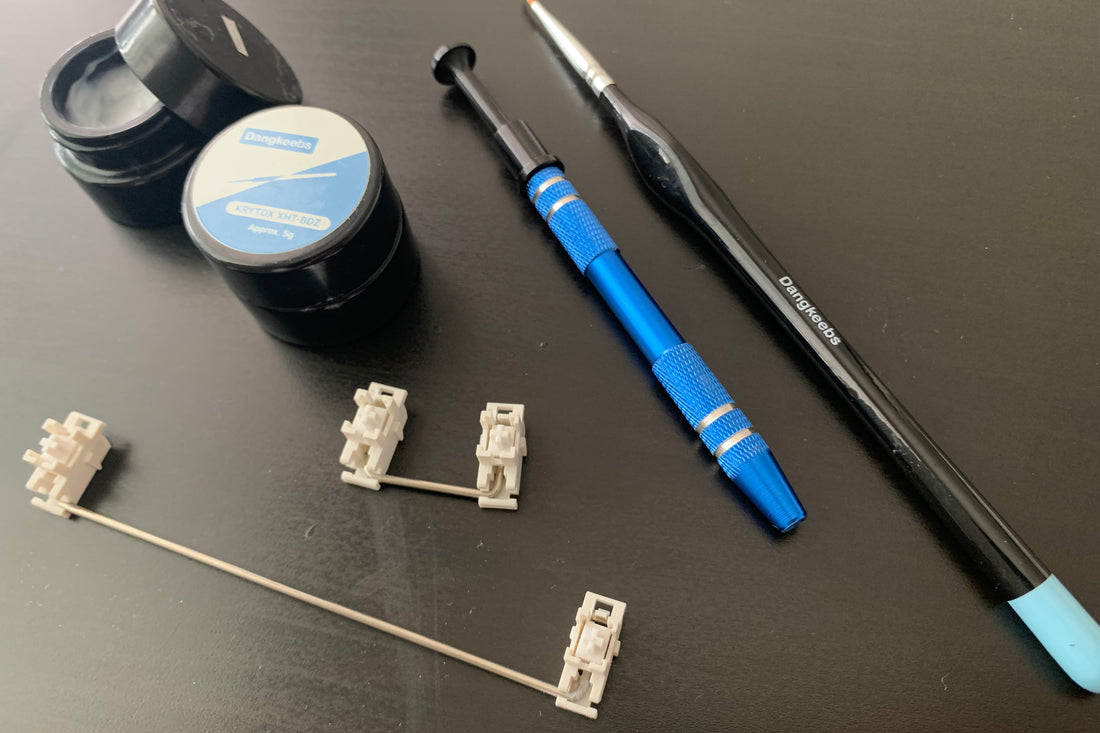
 Figure 1: Different sized Durock stabilizers with various tools and lubricants used for tuning.
What do you need?
-
Brush
- When selecting a brush, we highly recommend size 0 as it’s difficult to navigate the small corners and edges within a stabilizer with large brushes.
-
Lubricant
- We recommend using 205g0, or XHT-BDZ for your stabilizer parts.
-
Clean surface/desk
- As always, a clean surface or desk will help you keep your parts organized and make it easy to find any stray pieces.
Other Materials you may need:
-
Switch Stem Holder
- Stabilizer modding can get messy. Being able to hold your stabilizer stem with a switch stem holder ensures less lube ends up on your fingers and better grip.
-
Syringe
- Although not necessary, this allows you to quickly make any final adjustments once your board is assembled.
-
Wire Cutter
- Some older stabilizers will have stem legs that need to be clipped to improve the stability and acoustics. Most stabilizers at the time of writing this come pre-clipped. If you find your stabilizers need to be clipped, we’ll briefly touch on this below.
-
Stabilizer Stickers
- Stabilizer stickers or pads are bits of soft material with an adhesive backing designed to go on the Printed Circuit Board (PCB). These little bits of material are often poron, or silicone. They’re designed to soften the impact when the stabilizer hits the PCB.
What are the Main Types of Stabilizers?
Plate Mount:
Plate mounted stabilizers are attached to the plate of the keyboard rather than the PCB. They clip into place with friction. An example of plate-mount stabilizers would be Durock Plate-mount Stabilizers.
PCB Mount:
PCB mounted stabilizers are mounted to your PCB rather than the plate. These stabilizers are available as clip-in or screw-in. Clip-in stabilizers will clip into place on the PCB whereas screw-in stabilizers will mount via a screw. An example of a clip-in PCB-mounted stabilizer would be TX Stabilizers. An example of a screw-in PCB-mounted stabilizer would be Durock V2 Stabilizers.
What are Parts of a Stabilizer?
- Stabilizer Housing: You will have one on each side. The housing allows the stabilizers to be mounted onto the keyboard.
- Stabilizer Stem: The stem along with the housing holds the wire into place and allows the up and down movement as you make a keystroke.
-
Wire: The wire is the metal bar that connects the pair of stabilizer housings and stems.
 Figure 2: Disassembled Durock stabilizer with labeled components.
Stabilizer Sizing:
Stabilizers come in a variety of sizes. Commonly you’ll find stabilizers which are 2u, 6.25u, and 7u in size. The spacebar is generally 6.25u, but may be 7u in certain keyboard layouts. The smaller stabilizer size is commonly 2u, and this is found in your backspace, shift, and enter keys. Depending on the layout, you may have 3-7 2u stabilizers.
 Figure 3: Differently sized stabilizers to fit various sections of the keyboard.
If you’re ready to begin the tuning process let’s go through the steps. First prepare a clean working surface, and carefully remove the stabilizers from your keyboard.
1. Disassemble your stabilizers from your keyboard by holding one of plastic ends, turn 90 degrees upwards until you hear a click that releases the parts. Separate the parts onto your surface.
2. OPTIONAL (Only if your stabilizers have legs): Once you have disassembled the pieces, let’s look at each individual parts. Starting with the stems. If your stabilizer stems are not flat, and there are smaller protrusions – these are called legs. These legs will need to be clipped. We recommend using wire cutters or a sharp blade
Take small wire cutters and remove the two prongs cleanly. You want the bottom to be flat for better acoustics.
3. Moving onto lubing the stabilizer housing. We lube the housing because the plastic on plastic, and plastic on metal action contributes to scratch and rattle. Lubing helps reduce the friction and acts as a cushioning agent between parts. With a thin brush, dab a bit of 205g0 on the inside walls of your stabilizer housing and evenly spread lube on the surfaces. you will notice a slight cloudiness or sheen on the housing walls.


Figure 5: Stabilizer housing with a brush showing indications of where to apply lubricant.
4. BEFORE inserting the wires, you will lube the wires with either 205g0 or XHT-BDZ. If you’re using 205g0 you may apply a generous amount. If you’re using XHT-BDZ be sure to apply only a thin coat otherwise you risk making the stabilizers sluggish. Regardless of which you’ll use, you’ll spread the lubricant evenly on the wire, until you no longer see the actual metal. You’ll want to be sure to lube the bend and slightly beyond the bend where the wire makes contact with the stabilizer housing. Then insert the lubed wire into the bottom hole (of the two) and then click the wire into the housing. Be sure the two housings are facing the same way on each side!!
 Figure 6: A 6.25u sized wire with lubricant coated on the legs and angled bend.

Figure 7: A 2u sized wire with lubricant applied to both legs and angled bends on the wire.
5. Reinsert your stabilizers back into your keyboard to test the sound. Place keycaps over the desired stabilizers for testing.
 Figure 8: Stabilizer stem with indication of which hole the wire needs to be reassembled into.
6. Test out the keys that are on top of the stabilizers to see if the rattling noise is dampened. For your space bar you might have to click along the keycap to hear the sounds throughout. If you think it requires additional lube you can use a syringe of 205g0 lube for a quicker and easier process. To do this, carefully lift the stabilizer stem with a prong tool. Insert the syringe in the space between the stem and wire, and slowly inject the lubricant. Please be sure to pay attention to how much pressure and lube you are applying. Again, a little goes a long way! You can always add more later, but removal is more difficult!
 Figure 9: A syringe with 205g0 lube is inserted into the space between the stabilizer’s stem and wire.
7. Then do another quick sound test and if you are satisfied with the sound and feel you have tuned your stabilizers!
Now… what do you do if you over-lubed your stabilizers?
If you think you used too much lube and it is sluggish (slow press and return of the keys) you may have to remove the stabilizers from your keyboard and remove any excess lube before reassembling.
Once you’re satisfied with the sound and feel, you have accomplished tuning your stabilizers! If you’re in need of additional help, we’re always here for you! Please feel free to reach out to us at hello@dangkeebs.com with any questions.
If you’re looking into replacement stabilizers or lubricants, you can check here!